Starting a Facebook Group For Real Estate
Last month, we explored why agents should consider using Facebook real estate groups to market their business. In short, Facebook groups let you build relationships with future prospects, and they can be a tool to establish your brand and expertise with your target audience.
Now we can all agree that these are valuable outcomes, but how do we even start setting up a Facebook group? Today, we’ll talk about how to get your Facebook group up and running. We’ll also share some tips on how to prevent future issues, so you’re not spending more time than necessary on running your group.
You Must Be a Directory Pro Member To See This Article.
You Must Be a Directory Pro Member To See This Article.
Jump to a Section
Planning Your Facebook Real Estate Group
Creating your Facebook group is fairly straightforward. Even so, you’ll want to invest time upfront to get the most from it. At a minimum, you should carefully consider:
- the focus of your group,
- the rules for what can be posted,
- and how you will recruit new members.
Choose a Focus For Your Facebook Group
A vibrant Facebook group starts with choosing a name that establishes the group’s reason for existing. Remember that the reason you’re creating this group to attract new leads and position yourself as an expert in some area. That means your group needs to add value for your target audience and be relevant to the niche you want to occupy.
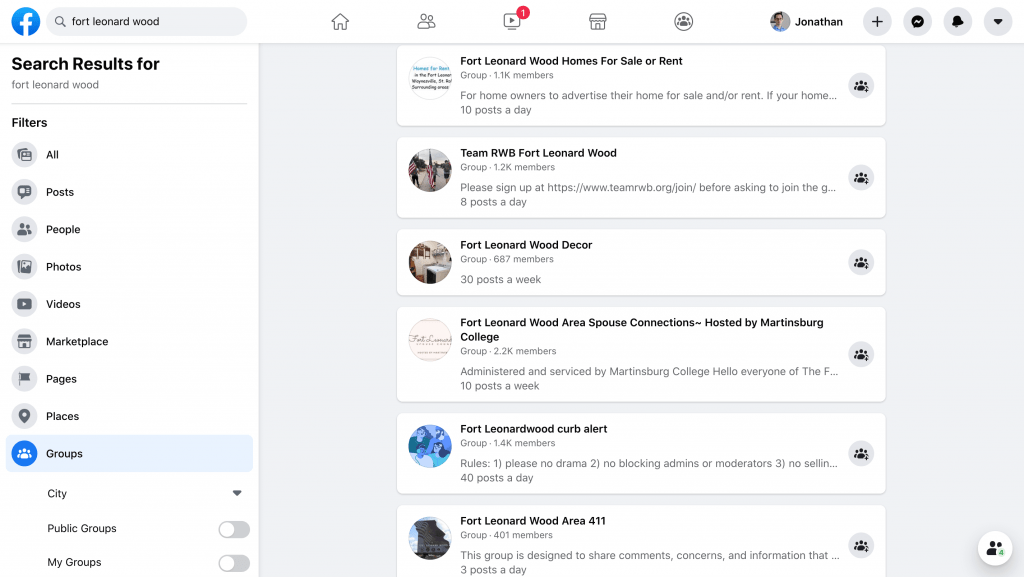
Let’s look at an example. Suppose you want to attract military families from a nearby base and brand centers around be supportive. You could focus your group on answering questions about the local area for newly stationed families.
From there, you’ll want to consider what new families would type in a Facebook search to learn about their new base. You’ll want to use these keywords in your name (as well as your group description). For instance, you could create a “Fort Campbell Area Info” or “Edwards AFB Parent Network.” In both of these cases, the base name serves as the main keyword.
Create a Group Description and Rules
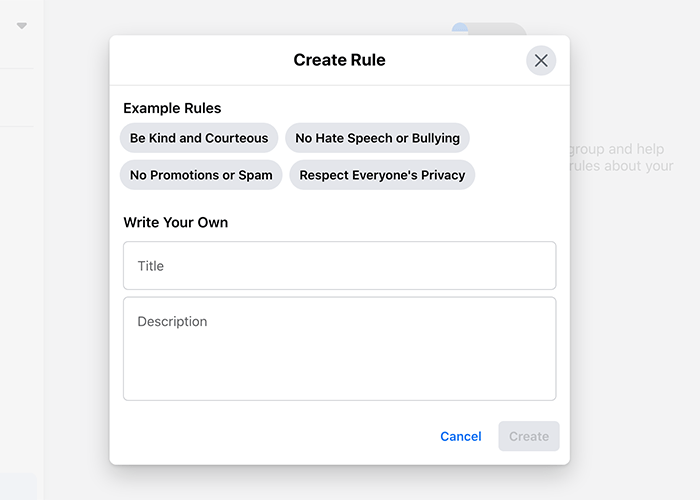
Your group description and rules provide the structure that allows your group to flourish. They help your group members understand what content to post in the group, who can join, and how to conduct themselves. They also provide the basis for removing members and posts if the need ever arises.
Facebook groups can have up to 10 rules, and each rule typically includes a title plus a description to clarify the rules. Facebook also provides templates for common rules to save you time with this step. Every Facebook real estate group will have different needs, but here are some things to consider when making the rules:
- What types of posts are acceptable and unacceptable?
- Are promotional posts for other businesses allowed?
- Can anyone join the group or are there membership requirements?
- Is possibly sensitive or personal info going to shared? How will privacy be protected?
- What potential liabilities might arise from group discussions? How will you protect yourself?
Recruit New Members to Your Facebook Group
To have an engaged group, you need group members. Once you reach a sizable audience, recruitment will largely take care of itself through word of mouth, but getting to that critical mass can be a struggle early on. A good recruiting strategy helps you reach that point faster.
First, determine whether your Facebook group will be public or private. A public Facebook group lets anyone join. This makes recruitment easier, but these often take a lot more time to moderate. Typically, this is not a good option for real estate agents.
On the other hand, new members must be approved in a private Facebook group. You can also set up to screening questions new members must answer before being admitted to the group. Facebook even allows for automatic approval of new members based on whether they answered the membership questions, location, and how long they have been on Facebook.
Facebook Group Recruitment Strategies
From there, you need a way to spread the word about your new Facebook real estate group. Here are a few recruitment strategies you can try:
- Share a post about your Facebook group on your business’s Facebook page
- Create a contest or giveaway for people who join the group
- Give special benefits like exclusive content or discounts to group members only
- Share links to your group on related Facebook groups
- Include group info in your email signature and on your website
- Partner with another local business to manage and promote the page
Creating Your Facebook Group For Real Estate
Once you have a plan, it’s time to create your group. Since you’re doing this to promote your business, the group should be linked to your Facebook page not your profile. This requires a slightly different process than the normal method of creating a Facebook group.

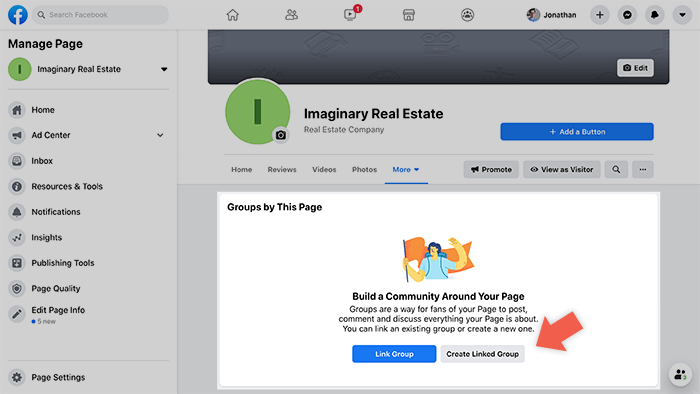
First, go to your business’s Facebook page. Next, find the Groups tab. If you’re on a desktop or laptop computer, this should be beside the links to view Photos, Videos, and Reviews, and you may need to click “More” to see the Groups tab. If using a smartphone, you should find this link near the top, and again you may need to click more to see the link.
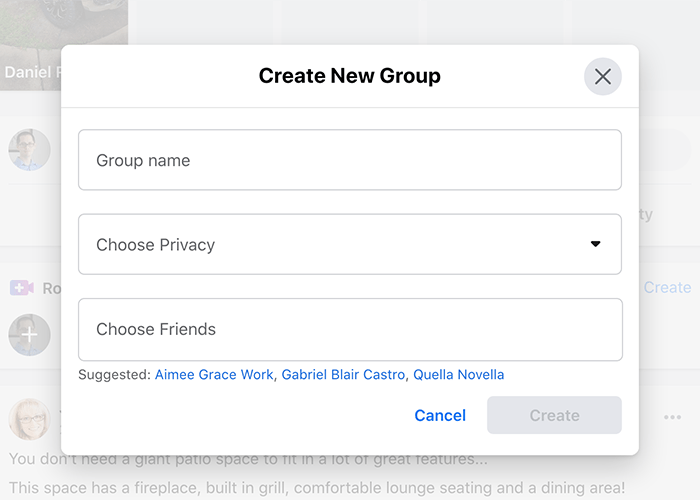
After clicking the “Groups” tab, click the “Create Linked Group” button that appears. From there, you’ll be asked to enter your group’s name, a description, and to invite members. Inviting members at this step is optional, so you probably want to skip this until you have your group rules set up. Last, click the “Create” button.
Basic Settings for Your Facebook Group
Now that you’ve created your group, you can edit the basic group settings. You can access group settings from the sidebar of your group’s page. The group page should be accessible from the same tab where you created the group.
Facebook offers its groups a ton of choices for settings that continue to evolve as they add new features, but certain settings hold more importance for real estate agents. So let’s take a look at a few you should address.

Group Rules
As we said earlier, Group Rules play an essential role. They let people understand what to post, and they maintain an inviting environment for your potential customers.
Group Description
The group description can play a big role in convincing potential members to join the group. Not only does it tell what the group is about, but the words used here influence which searches your group appears. So you’ll want to include keywords here that will help people discover your group.
You should include group policies and rules in your Group Description, too. This makes them easily accessible to members and helps you will enforcing rules as needed.
Finally, your group description can be a great place to include links and contact information. This makes it easier to convert your group members into paying customers.
Cover Image
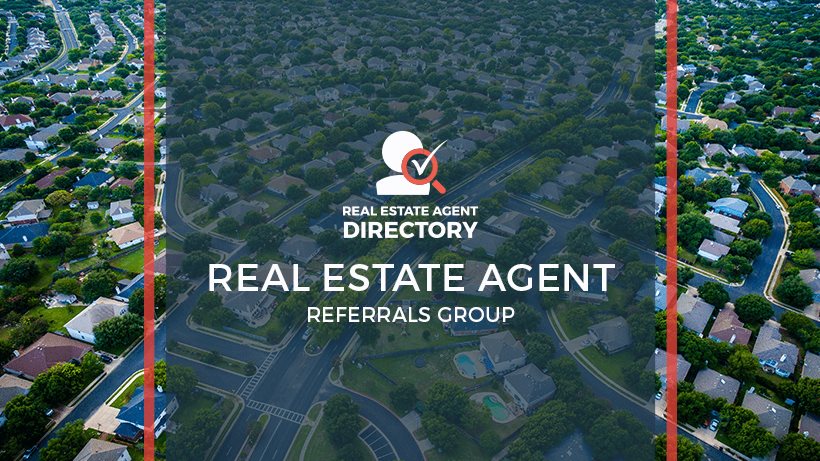
Your cover image acts as a visual introduction to both your group and your brand, so it deserves attention. This can be a great place to add a logo or contact info. Take a look at the Real Estate Agent Referrals group for example. The cover image prominently features the Real Estate Estate Agent Directory logo to reinforce its connection with this group.
Membership Questions
As I mentioned earlier, member questions can be used to screen potential group members. This helps eliminate members that don’t fit your target audience and potential spammers. You can also use the questions to learn more about the needs of your potential customers.
Other Important Group Settings
Under the Settings page for your group, you can access even more settings critical to the management of your group. For our purposes here, we’ll just look at the most important settings that impact how you promote and manage your group.

Set Up Group > Hide Group
This setting controls whether your group can be discovered through the Facebook search and Discover Groups pages. For most agents, this should be set to “Visible.” Hidden groups are typically used for groups where members have to pay for membership or for internal employee groups.
Customize Group > Web Address
Facebook assigns each group a default web address that begins with facebook.com/groups/ followed by a long number. You’ll want to change this to something more memorable. This makes it easy to share the group with others. You can change the number to any words you want, but no spaces or dashes are allowed.

Manage Membership
These settings determine whether members must be people or if other business Pages can join the group. Allowing other Pages to join the group weakens your own Page’s association to the group, but allowing Pages to join may make sense in certain situations. For instance, if your target audience includes other businesses and business owners then you may consider allowing Pages to join the group.
Membership settings also allow you to delegate who can approve new member requests. This can be a huge time-saver for busy real estate agents. If you decide to allow others to approve member requests, just be sure to brief them on what types of members you’re after.

Manage Discussion
These settings control how new posts to the group are handled. First, you can choose whether members or only admins can create posts. Posts can be set up to require approval from an admin, or posts can be set to appear to group members without approval.
Setting the posts to require approval lets you control the quality of the group content, but it also requires daily attention. On the flip side, unrestricted posts run the risk of allowing low-quality or even inappropriate posts to appear, but they reduce the time you devote to the group.
In a highly engaged group, you may be able to get away with allowing any member to post without because other group members often help police the discussion. You can also choose group members to serve as admins or moderators. Admins are members that have the ability to change group settings whereas moderators can only control posts.

Start Adding New Facebook Group Members
Once you have your basic settings in place, you’re ready to start adding members. First of all, you’ll want to invite your Page followers to join your Facebook group. You invite individuals by clicking the invite button on your group page and then enter their names. You can also copy the link to the page and share it as a Facebook post.
If your group has been set to require the approval of new members, you may receive notifications as requests come in. You can also click the Member Requests link to view and approve new requests.
And with that, you’ve done it. You’ve started the journey of using Facebook groups for real estate marketing. The next step will be to grow and maintain your group, so you can start using it to drive leads, but we’ll save that for next month. Between planning and setting up your group and your normal responsibilities, you’ve got plenty to keep you busy!
Popular Articles
House Flipping: Tips from the Experts
House flipping is a real estate investment strategy that has caught the attention of entrepreneurs and real estate enthusiasts. To succeed in house flipping, investors must find properties with hidden potential that they can transform through smart and strategic...

Virtual Home Tours on Social Media: Tips for Success
Property agents know that the key to a successful sale is often hosting an open house. Traditionally, open houses have been in-person events held at the property, and therefore subject to limited flexibility to cater to the busy combined schedules of owners, agents...
Creating Calls to Action for Real Estate
Picture this. You've finally got homebuyers' attention with an amazing Facebook post. They click the link to your Facebook business page. They're instantly impressed with the beautiful cover image and your professionalism, and yet nothing else happens. Your potential...

5 Ways To Leverage Property Data In Real Estate Marketing
Not so long ago, the bulk of decisions made within the real estate industry relied heavily on anecdotal information and gut feeling. Not surprisingly, some of these decisions didn't hit the mark and proved costly. These days, thanks to big data and advanced data...
Schedule a TurnKey Suite Demo
Speak with a specialist to see how you can benefit from the TurnKey Suite real estate marketing service for Facebook. Simply choose a date below to get started.


